Windows own Steps Recoder is usually enough in case you want to record you screen, but you might want to change the quality option in order to decrease the file-size or you just want to ensure that it is playable in all media players – VLC fills the gap and allows you to quickly record your screen with only a few clicks.
VLC the all-in-one player
Apart from playing any file format VLC (Video Lan Client) Media Player also allows you to stream videos and besides that VLC also has other lesser-known functions such as the ability to rip DVD’s. The most underrated function is to record your screen in a god quality, which we’re covering by this tutorial.
To record the Windows 10 screen using VLC, simply follow the steps below:
- Open VLC Media Player. If you don’t already have it installed, download it from Videolan’s official site for VLC. The media player is available for each platform and this tutorial works the same on all of them.
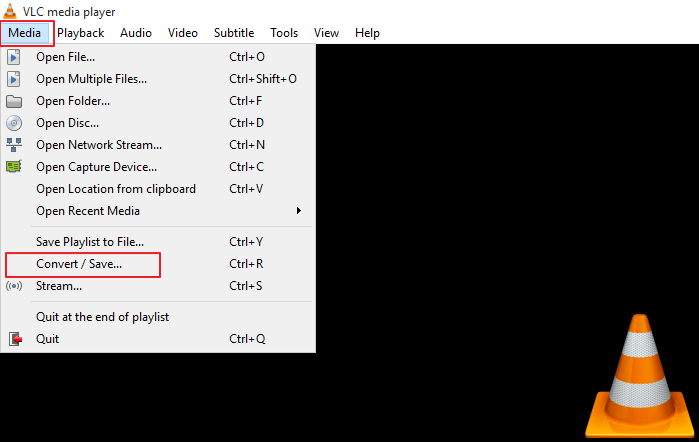
- Click the Media menu on the top bar of the player, then select the “Convert/Save” option.
As you can see a new option window appears. Click the “Capture Device” tab, and under the “Capture Mode” section select “Desktop.” Down there you’ll also find the option to select your preferred frame rate for the capture. Choose a decent frame rate. 15 up to 30 frames is enough, if you choose more you file size will be much bigger and there is not really any benefit.
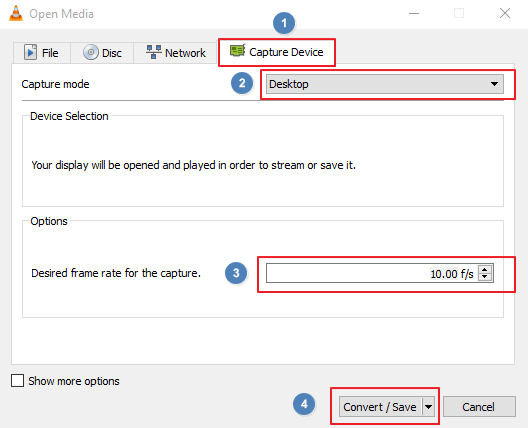
- Click the “Save” button to continue.
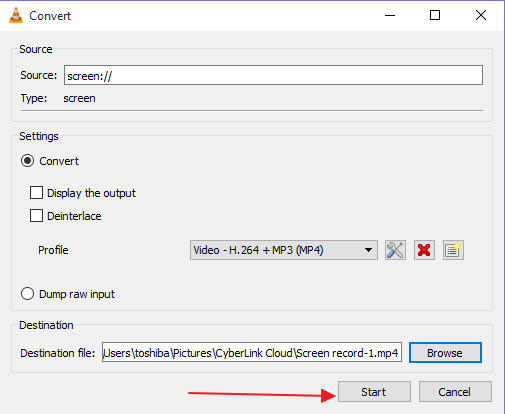
- Clicking the “Convert/Save” button will open the convert dialogue box. This is where you will choose where you want your file to be saved e.g. your Desktop. Click the “Browse” button in the destination section at the bottom of the window to select your preferred destination.
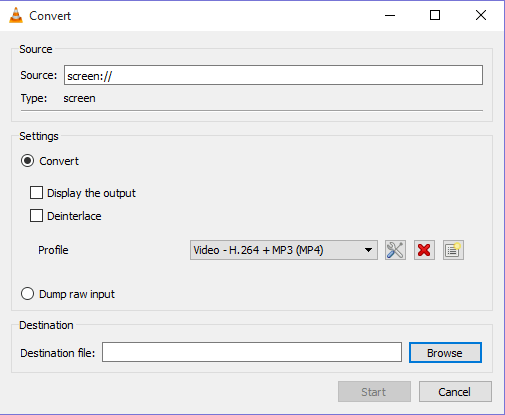
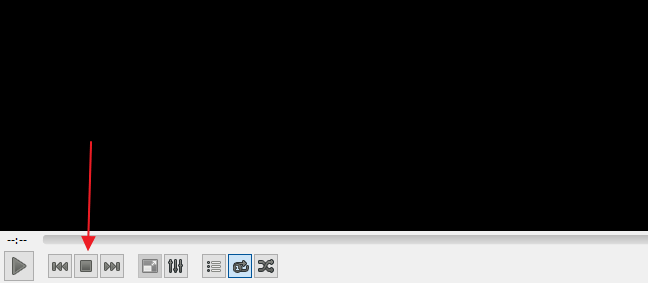
- Click “Save” to continue once you’ve defined your preferred location, and the system will take you once again back to the convert dialogue. Now click the “Start” button to start recording the screen. Note that the “Start” button will only become active after choosing the destination file and it should be also mentioned that VLC will not show you any indication on the screen (unless you choosed to see the output in the options) that it is recording! Keep this in mind before you start your recordings.
Some Information regarding to the screen recording function
Please keep in mind that VLC won’t replace professional screen recording programs, which means some functions aren’t present in VLC and might be never been added. For example you can’t select a specific screen area which you want to record.
VLC doesn’t let you use your voice in the screen recording. That means you’ll need to record your voice separately and then stream the audio along with the screen recording.
Final Words
VLC offers bunch of more options compared to MS Steps Recorder but it won’t replace other programs in case you want to have more options and abilities but VLC never was designed as a help in case you like to show video related problems, however it does it’s job even if you need to edit it afterwards with other tools and it’s a good method in case you use VLC. This is quite a unique feature and shows yet again that VLC is a swiss army knife rather then just only a ‘player’.

You must be logged in to post a comment.